Do you like to draw? Have you ever tried to learn to make art on a computer? If so, how did you do it?
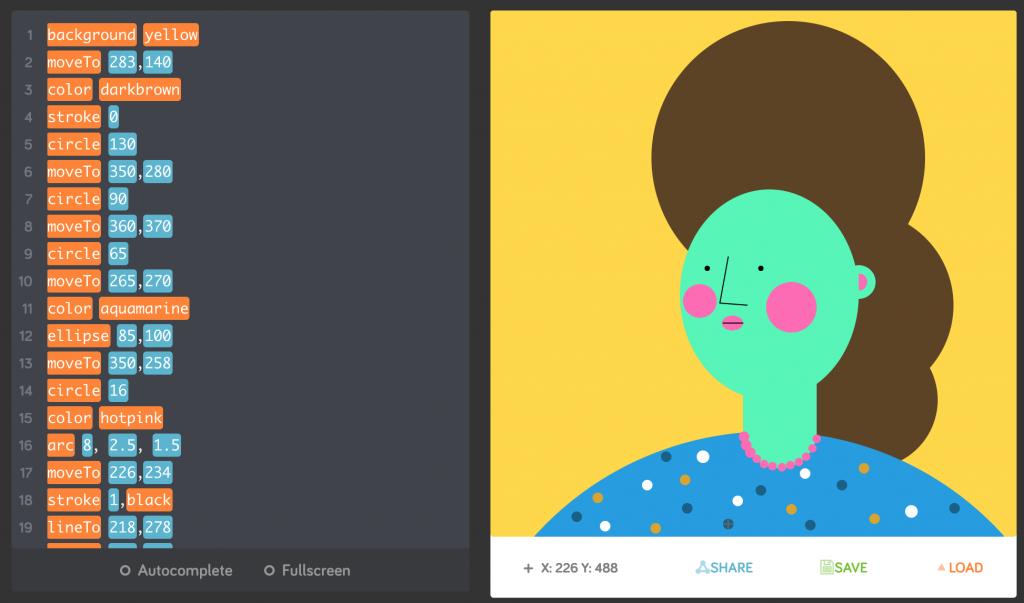
Computers are changing the way we create art every day. From Disney films to 3D printed jewelry to laser cut wood prints to art made from code! Art is changing and using technology to create this change. Now, let’s learn how we can create our own art with code!
Getting Started with Make Art
We will use a platform called Make Art to create art with code. Make Art was developed by Kano that allows you to type in a programming language called CoffeeScript to turn a drawing into a digital piece of art!
When you get to the platform you should see a few images with different challenges you can do. Challenges are exactly that, challenges that Kano team creates to help you get used to the coding environment and start learning code. They are walk-throughs that provide specific instructions to move forward and you can customize your creations afterward!
![]()
If you click “Menu” you will get an option for “New Creation.” Here there are no walkthroughs, instead, it is an open space for you to create! Take the skills you learned in the walk-throughs or tinker around to see what you can create!
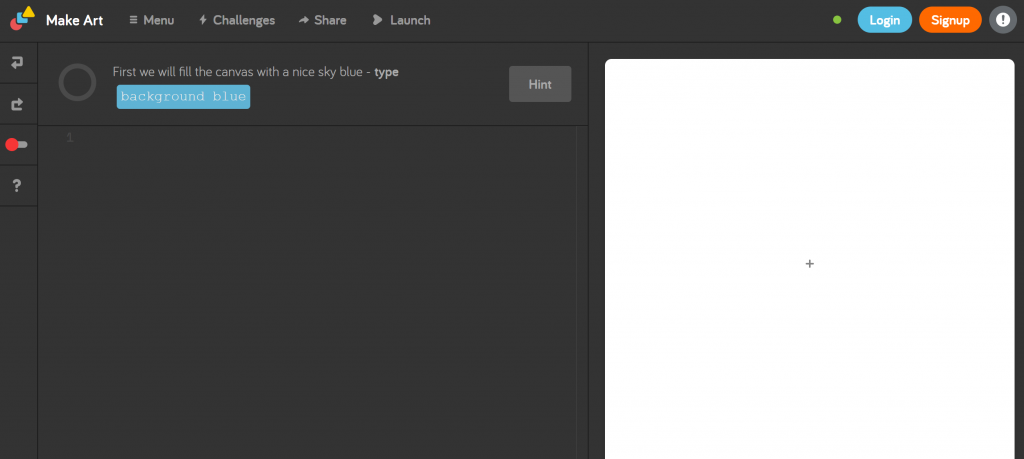
When you open up Make Art in “challenges” or “new creation” you will see a screen like the one below. The left side is where you will code, and the right side is where you will see your creations start to grow and be built!

Try hitting enter a few times in the dark left side. You will notice numbers appear. This is a number system to help you create individual lines of code.
Now on the right side move your cursor around. You should notice that in the bottom left corner of the white screen you will see the “x” and the “y” move positions. In Make Art you are creating masterpieces on a grid that corresponds to a coordinate plane. You can use your cursor to help you identify where on the grid you need to draw!
If you click the “?” you will open the reference menu. Here you can get reference materials to help you learn the keywords to code a specific shape, add text, lines, or color.
On the left side, you will notice 7 gray boxes. These are buttons to different windows that give you information on Make Art!
Shapes: Do you want to create objects? You can create shapes: circle, ellipse, square, rectangle, and polygon in this section with the example code shown.
Lines: With this button, you can draw lines! These include drawing a line of a certain size, and drawing a line to a certain point
Position: We want to create in different spaces on our digital canvas. To do this we need to learn how to move around on the board. You can see example to move the cursor a certain distance away and move the cursor to a particular position
Text: Maybe you want to say something in words. Use the text box to learn examples to write a message, set size and/or font, sets bold text on (true) or off (false), sets italic text on (true) or off (false)
General: This button explains a few things that don’t fit in the other categories. Such as repeat code or get a random number in a range
Colors: What is a piece of art without color? In the color button, you will see examples to set the background color, change the color in use, change the width and color of the stroke border, set a color’s brightness, set a color’s saturation, rotate a color’s hue angle by a given amount, and set how see-through color appears on the screen.
 Try it out: Get used to Make Art! Explore the basic challenges and start coding some of your first art creations. Once you finish the basic challenges, explore some of the others, or check out other creators on Kano World.
 Challenge Yourself: Draw a picture on a piece of paper. Try to use simple shapes like circles, rectangles, and squares at the start. Now, once you have drawn your picture try to create the same drawing in Make Art!

Share Your Work: Let us know how you are doing. Share a picture of your digital artwork with iamtheCODE by emailing us at codeclubs.org or by tagging us on social media using the hashtag # VirtualCodeClubs